Oil and the Aircraft: How Much and What Type?
Checking the level is an important part of the preflight inspection.
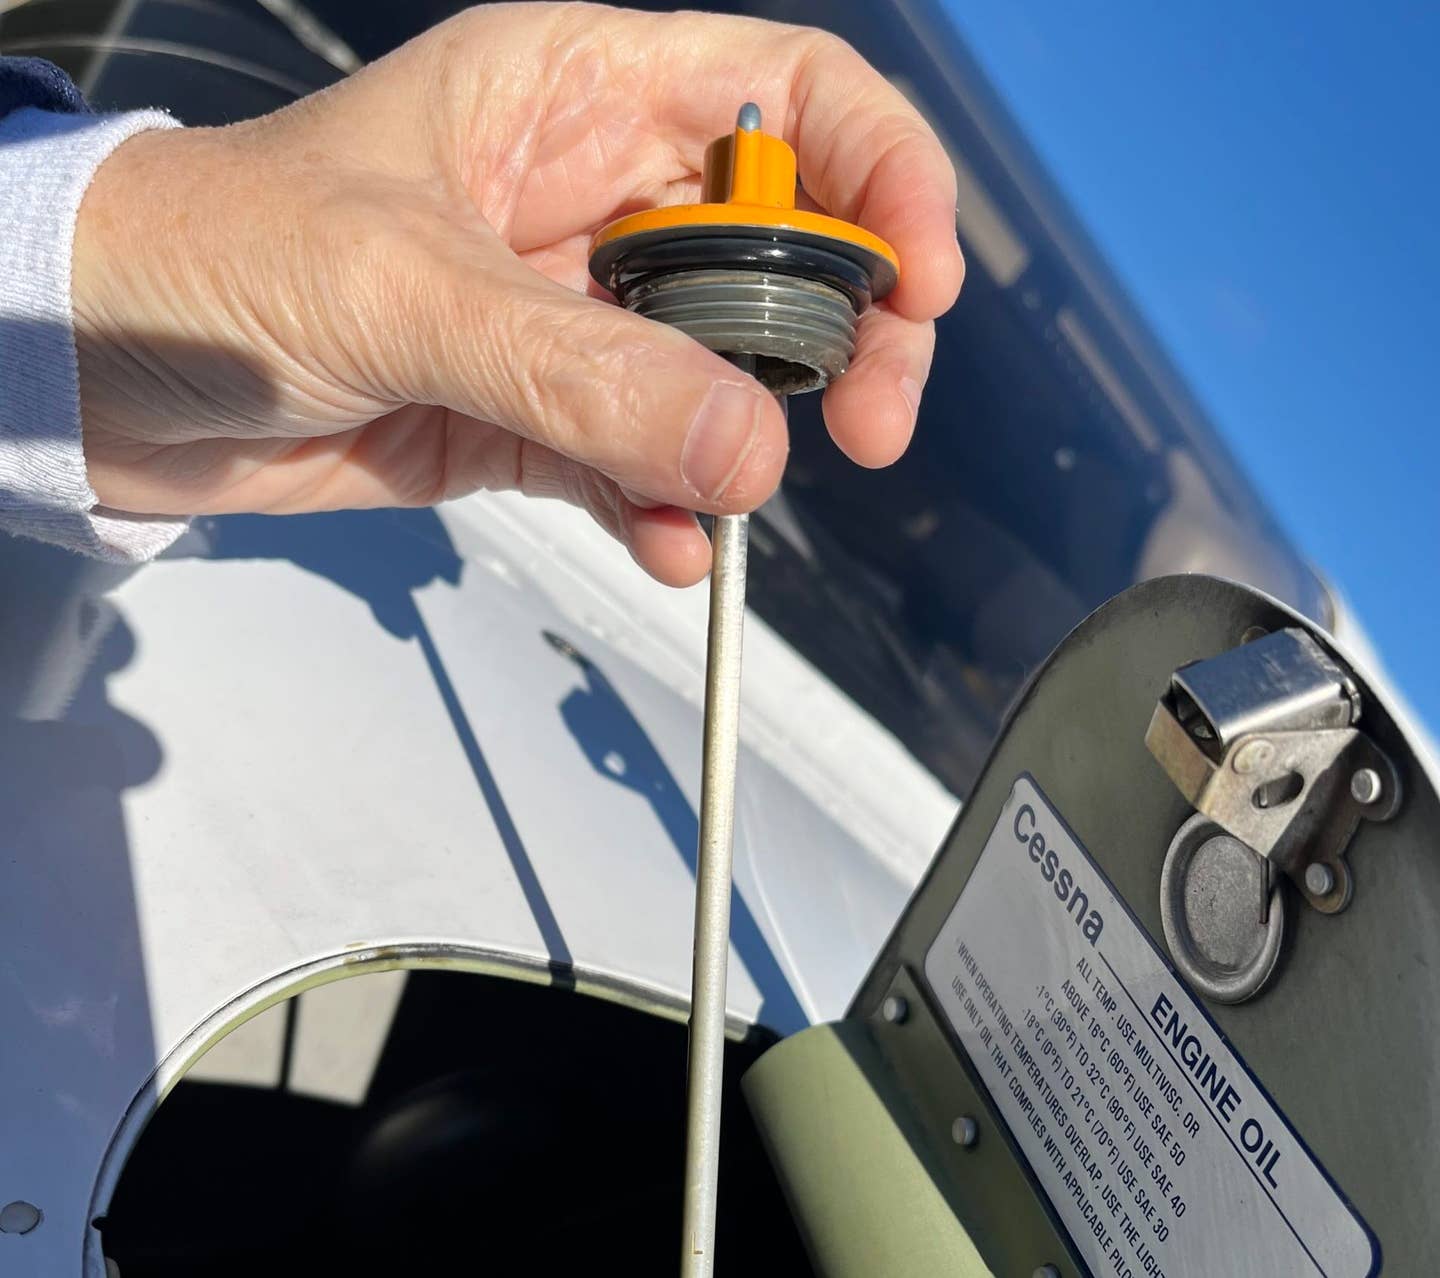
Checking an airplane’s oil level during preflight is of critical importance.[Courtesy: Meg Godlewski]
Oil is sometimes referred to as the blood of the aircraft. It provides lubrication, cooling, and carries away waste products. Without it, or without enough of it, the aircraft engine cannot function for long. Checking the oil level is part of the preflight inspection, and knowing the proper way to add oil (use a funnel or oil spout) and how much should be required knowledge before first solo.
Knowledge of the oil system of the aircraft you fly is a must. There will be variations between models of aircraft, so if you fly many, add this information to your personal preflight briefing.
- READ MORE: What’s the Best Way to Add Oil to an Aircraft?
Specifically, knowing the type of oil your aircraft takes, the manufacturer's recommendations for specific operations such as engine break-in or specific temperature ranges, along with the size of the oil sump.
This information can often be gleaned from the POH for the aircraft. Pay attention to the details. For a Cessna 172S, for example, MIL-L-6082 or SAE J1966 Aviation Grade Straight Mineral Oil is used when the airplane was delivered from the factory and for the first 25 hours.
If there is a flight school aircraft, there will likely be a reminder placard on the aircraft dispatch binder reminding you of this limitation, and those 25 hours will be tracked.
- READ MORE: 5 Biggest Mistakes Student Pilots Make
The POH advises "this oil should be drained and the filter changed after the first 25 hours of operation. Refill the engine with MIL-L-6082 or SAE J1966 Aviation Grade Straight Mineral Oil and continue to use until a total of 50 hours has accumulated or oil consumption has stabilized."
This is where airplanes are like people—they have quirks. One C-172 in the fleet might consume 1quart of oil for every 8.1 hours of flight, another might burn 1 quart for every 7.9 hours. Learn the quirks like you learn which one of your children has the allergy to peanuts to avoid unpleasant surprises.
When an aircraft begins to use an excessive (for it) amount of oil, it's often a symptom of a bigger, often expensive problem, such as an oil leak. This is why many instructors teach the learners and renters to begin the aircraft preflight inspection by approaching from the front and looking for oil spots beneath the cowling or drips on the nosewheel, if appropriate, and the dreaded greasy belly.
- READ MORE: IFR Training: More Than Just a Requirement
Sometimes the culprit is overfilling the sump. This is often learned by trial and error. Let's say the capacity of the oil system, per the POH, is 8 quarts. The sump is 7 quarts. If you overfill the sump to a full 8 quarts, that extra quart will be sprayed out the breather tube, resulting in a greasy belly and drips on the pavement. The owner of the aircraft might put a placard in the airplane on the oil cap door warning not to overfill the sump past 7 quarts.
The POH includes information on the minimum amount of oil necessary for flight. Always double-check this when the oil reads “low.”
Most flight schools and flying clubs have a procedure in place to keep track of oil usage. It can be as simple as making a note in the dispatch binder or placing the empty bottles on a specific location for tally at the end of the week.
Operating with too low a level of oil is a recipe for engine damage, and ultimately, failure. Although oil level is checked as part of the preflight inspection, once you are in the air, you'll have to use other means to monitor oil consumption, such as engine and oil temperature and pressure. If the former two go up and the latter goes down, there could be a problem. If the aircraft has annunciation lights, you may get a “LOW OIL PRESSURE” indication. If this happens, expect a loss of engine power or stoppage and find a place to land as soon as possible.
Oil leaks can be difficult to spot from inside the cabin unless you get a geyser in flight that covers the windscreen, in which case you have to be a special kind of foolish not to recognize an issue.
’Tis the Season to Change Oil
As a student pilot, I knew it was spring when I walked into the lobby of the flight school and the whiteboard carried this message: “WE ARE NOW USING SUMMER OIL.” One by one the fleet aircraft were going into maintenance for an oil change, and the winter oil was going back into the storage shed where it would stay under lock and key until the weather changed. This was so it didn't accidentally get put into an airplane when it was seasonally inappropriate.
Typically, higher-viscosity oil is used at higher temperatures. The viscosity, also known as the "weight" of the oil, is determined by the Society of Automotive Engineers—where the SAE comes from when you read the label on the bottle that reads SAE 50 or 100W.
Those labels can be confusing, so many flight schools put a photo copy of the oil bottle label in the aircraft dispatch book along with a textual description such as "the red bottle."
You have probably heard the warning that aircraft can develop issues when they sit on the ground and don't fly. Part of that is when oil does not circulate in the engine, it can pick up moisture and other contaminants. Running the engine at flight power setting such as flying a few laps in the pattern warms the oil sufficiently to remove any moisture and stirs up any gunk (how my favorite mechanic described it) that may be in the oil sump. This is often done before oil changes.
The aircraft oil change is more than draining the sump then refilling it. Just like in a car, the oil filter which is a one-time use device made up of accordion-style folded paper. When it is removed, it is cut open to allow the mechanic to inspect it. If the filter looks like it has glitter in it, that's bad news. That's metal created from engine parts rubbing against each other, and it is time to get a new engine.
Dipstick Drama
Making a mess when you add a quart of oil to an airplane doesn't have to be a rite of passage. Begin by assembling the tools you will need. Use a funnel or spout, lots of shop towels or paper towels, and position yourself so you don't get covered with oil if the wind is blowing or there is a chance to get hit with prop wash.
Open the bottle of oil (sometimes it takes a blade to get the cap off) and place the bottle to the side. As you remove the dipstick from the filler neck, wipe the stick clean, and put it someplace secure, like on a few paper towels so you don't make a mess, then place it on top of the cowling. You don't want to place the dipstick on the ground because that could introduce dirt to your engine.
Hold the funnel or filler neck securely in place, then put the oil bottle into the opening. Don't try to pour the oil from above the filler neck because this usually results in a mess in the engine compartment. If you don’t have a funnel or spout, MacGyver something, like making a cone out of a piece of cardboard.
As the oil leaves the bottle, note the side seam of the bottle is clear, allowing you to see how much you are adding. When you replace the cap, it should be tight enough not to wiggle loose but not so tight that it takes Hercules or a specialized wrench to loosen it again. If you are of limited vertical stature, using a stepladder to get above the oil cap as you apply force to remove it provides better leverage as to twist it open.
Pro tip: Make sure the aircraft has at least two bottles of oil, a funnel, and shop rags aboard when you are doing a cross-country flight. You don't want to be the pilot who gets caught without it away from the base.


Sign-up for newsletters & special offers!
Get the latest FLYING stories & special offers delivered directly to your inbox